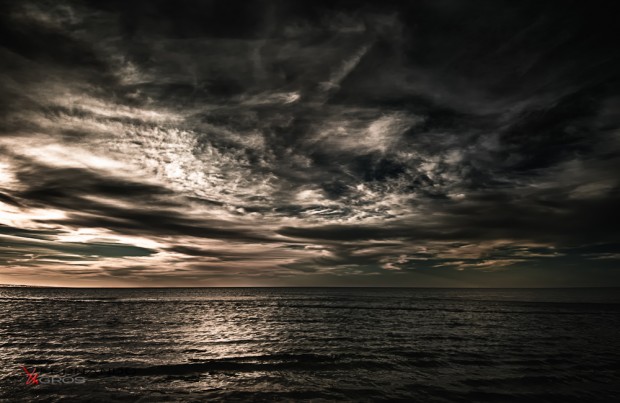
HDR Done Right (Part 2)
This is the second in a five part series looking at HDR (High Dynamic Range) photography. This time round I would like to share some ideas on how I shoot sets of images for HDR. The three approaches I’m outlining here represent my journey in HDR. A lot people assume that HDR is just about […]

This is the second in a five part series looking at HDR (High Dynamic Range) photography. This time round I would like to share some ideas on how I shoot sets of images for HDR.
The three approaches I’m outlining here represent my journey in HDR. A lot people assume that HDR is just about what you do with software, but like any photographic technique, creating good images right up front will help you get better end results.
Before Anything – Get One Good Shot
Before I start shooting HDR, I try to create one really good well exposed image – something that would stand on its own as a solid photograph. I do this for three reasons. First, I like to use this image as a reference for the colours and light contrasts that were present in the original scene. Second, as I will explain in the coming parts of this series, I like to blend my HDR conversions with non-HDR RAW files.
Finally, if I totally mess the HDR process up, I still have something to show for the session.
And, although this is not a hard and fast rule, I typically shot HDR with my camera mounted on a big sturdy tripod.
Centred HDR
One of the things that got me into HDR was, quite simply, trying to get more dynamic range into my images. I was frustrated because some photos seemed well exposed, for most part, but the shadows were too dark and the highlights were blown out.
One way to get over this was to use HDR. Starting with the generally well exposed image, then taking one frame underexposed enough to bring back some of the highlights and one frame overexposed enough to reveal the shadows (say ±0.7EV, ±1EV, or ±1.3EV). If necessary, making two darker and two lighter frames.
As you might imagine, this approach is well suited to the auto-bracketing modes available on dSLR cameras. In fact, many photographers make this their standard approach to shooting HDR, using the ±1EV auto-bracket. As long as you keep the exposure intervals constant, if is easy for any HDR software to merge the image.
However, this is a very mechanical approach. You are using standard exposure intervals as a way to estimate the right amount of light for each frame. For me, this approach puts technology and mathematics ahead of what is in the scene in front of you.
Top Down HDR
One of the problems with Centred HDR, is the amount of noise generated by HDR processes, often because the mathematically balanced sets of images produce at least one image that is just too dark and underexposed. After a while I started finding that when I shot five and seven frame HDR sets, I was jettisoning the darkest frame, sometimes even the darkest two frames and getting better results.
So, rather than start from one well exposed image and shoot either side of that, I started instead from one rather overexposed image, then shot “down” to “dark enough.” My goal was to have at least one image where even the darkest parts of the frame (above black) had some highlight detail and the lightest parts (below white) had a slight shadow. In between I tried to keep the intervals constant, so the HDR conversion software could more easily do its thing.
I think of this approach as filling the histogram. Most histograms look like a hill, or maybe two hills. Merging a set of images created this way should create a full and compressed histogram.
While this is technically a better approach, it’s still somewhat mechanical, or perhaps we could say, light driven. It’s better than Centred HDR, but I still didn’t find it ultimately satisfying.
Composition Driven HDR
So, I went back to the drawing board and asked myself – why am I shooting HDR? The answer made me change my approach. I’m shooting HDR because there are things, in the frame, in the image, that I want to viewer to see more clearly.
So, rather than start with approaches aimed at overcoming the technical limitations of the camera, I decided to experiment with letting the composition drive the exposures used for the HDR. If there are two, three, or four specific points of interest in the composition, then why not expose specifically for those, rather than try to create a HDR image that balances light for the whole frame, irrespective of how important each element might be?
So, I take my well balanced image, then look at it and decide which elements are most important, and create further frames that are (spot) metered to bring those parts of the composition out. This is a slower approach, it takes a little more work (and more attention at the conversion stage), but I believe Composition Driven HDR to be the strongest & most artistically sound approach to creating sets of images for HDR photography.
Final Thoughts
I hope you can find the opportunity to try some of these approaches out. If you have any questions please feel free to email me, or leave a comment. I’m happy to explain further.
I’ve intentionally left out a lot of technical detail, because I really believe as you develop your approach to HDR, you’ll find your own way to overcome some things, based on the gear your have the way you approach the software side of things.
Speaking of software, the next instalment in this series will be the first of two posts on how I approach organising and developing HDR images, using Lightroom, Photoshop and Color EFX Pro.


